

1-


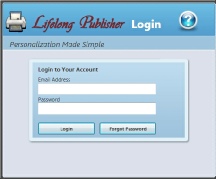
Enter your Login User name and password. Than click on the Login Button
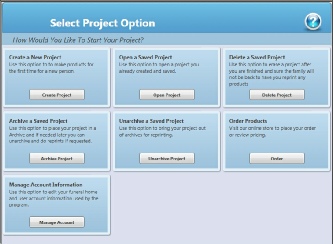
This screen provides several project options for working on your projects. Each option is explained If you click on the screen to the left.
This screen allows you to perform several different tasks, but for this tutorial we will assume that this is the first product you are creating for a project. Since we are creating a new project as a tutorial you would select the Create Project Button.
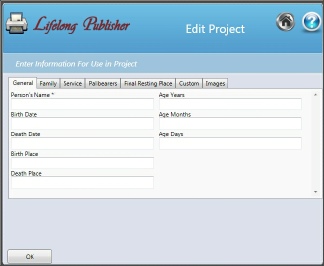
This screen is used to input the deceased’s information that will be used in creating your Service folder. You may wish to complete all the information for the deceased at this time to use in your service folders. It’s not a requirement since you will be able to add the remaining information at a later date.
Complete the information as needed and then select the OK button.

This screen is used to add products that you would like to create for the deceased. If this is the first product you are creating than this screen will be blank. To create the Service Folder select the Add New Product Button located on this screen.

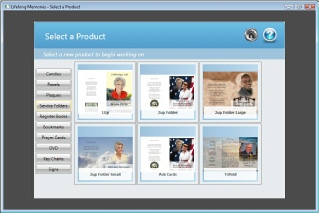
This screen is used to select a product that you would like to create. Since we will be creating a Service Folder select the Service Folders button.
This screen will show you all the service folder products that are available to create. For this tutorial we will be creating a 2UP medium service folder that is on an 8 1/2” x 11” sheet. This 2UP medium service folder has one score and one perforated line. For the 2UP medium service folder select the 2UP Folder picture.
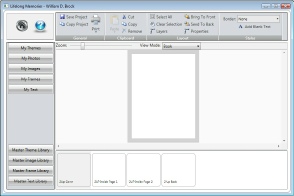
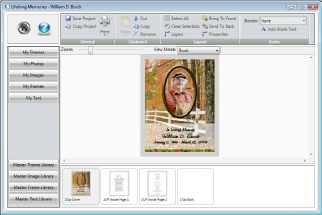
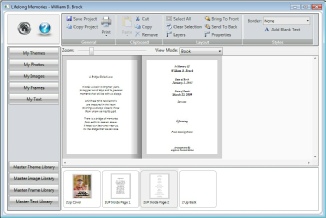
This is the main product creation screen for the 2UP service folder product. You will notice several buttons on the left side of this screen. There are two sets of buttons. The My library buttons and the Master library buttons. The My buttons will display to you the libraries you create while the Master buttons will display to you all the items available in the program. In some cases you will need to add items from the Master libraries to your libraries. This is true for Themes selections. To accomplish this select the Master Theme Library button.
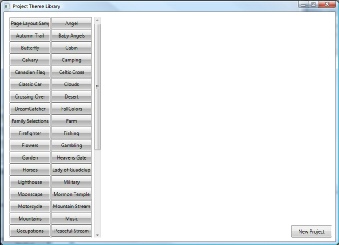
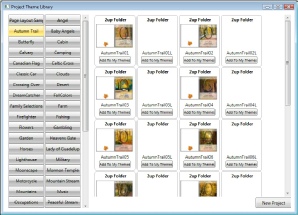
This screen will show all the themes that available to use for your service folder. The buttons will list all the categories available. Simply select a category that you are interested in. For this tutorial we have selected the Autumn Trail Category button.
This screen will show you all the themes available for that category. You will see an Add To My Themes button below each theme. To add a theme to your library to use simply select the button. As you add themes to your library this button will change to an Added button so you can easily keep track of the themes you have added. For this tutorial we have added the first three themes to the My Themes library. Upon completing this task simply close this master theme selection screen by clicking on the red x in the top right of the screen. Then select the My Themes button.
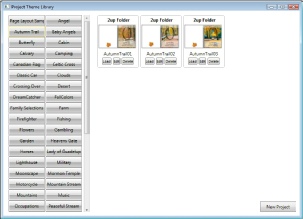
Since we added the Autumn Trail themes from the Master library to the My Themes Library select the Autumn Trail button.
You will notice three buttons at the bottom of each theme. You will see Load, Edit and Delete. The Load button will load the selected theme for your project. The Edit button will let you make changes to the actual theme for future use. For example if you wanted to change the font size and style for your themes to use you could do an edit, make the changes and any future use of the theme would use your changes. The Delete button would simply remove the theme from your library.
For this tutorial we will select the Autumn Trail01 theme by selecting the Load button located under the Autumn Trail01 theme.
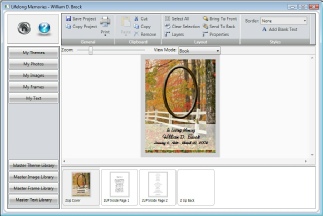
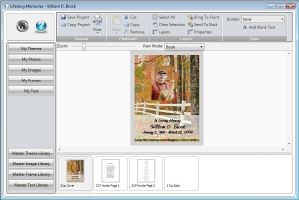
This is the main project creation screen for the 2UP Medium Service folders. You will notice that Lifelong Publisher will automatically place the project information into the project. This information was used from your data entry screen. With Lifelong Publisher you have the ability to make any changes that you would like with your project. Each element can be sized, move or rotated or even deleted. To edit any text items contained within your project you can simply place your mouse pointer on top of the text and double click your left mouse button. For this tutorial double click on the name information.
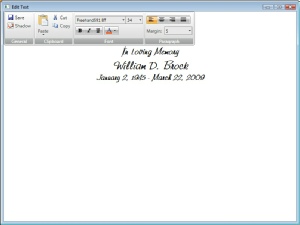
With our text editor you are able to make changes to your text as well as change anything with the text like font styles, sizes, colors, etc. Once you have finished making any changes select the Save option and the window will close with your changes
The next step with the creation of your Service Folder is to add a photo of the deceased. You have several options to accomplish this. First, your theme will already include a color matched frame for the deceased. If this frame is acceptable all you will need to do is place the photo into the supplied frame. Otherwise you can select a different frame to use or not use a frame at all. For this tutorial we will show you how to accomplish several approaches.
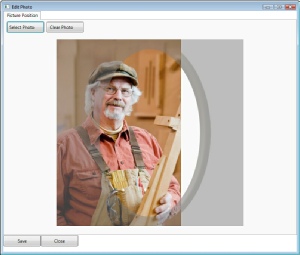
First, to simply add the photo to the existing frame in the theme, double click your mouse pointer on top of the frame. Upon doing so the following screen will appear.
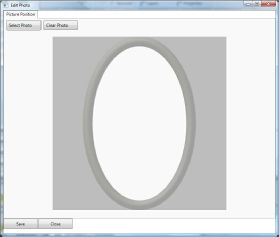
To place your photo into the frame, select the Select Photo button.
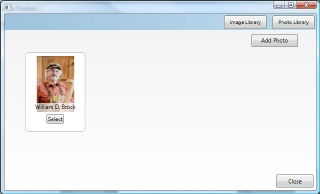
This screen will show you the photos of the deceased you uploaded when you were working on the data entry screen. You can use one of the photos or add an additional one if you wish. Also, it is possible to add images other than photos into frames if you would like. This would be accomplished by selecting the Image Library button and selecting an image from your library. For the purpose of this tutorial you can click on the Select button located under the photo you would like to place into the frame.
The photo will then be shown in your frame.
You now have the ability to move the photo and resize it to fit into your frame. To move the photo place your mouse pointer on top of the photo, hold down your left mouse button and drag the photo into position. To resize the photo place your mouse pointer on top of the corner and drag it until the desired size is reached. Repeat this process until you have the photo size and location the way you want it. Once accomplished select the Save button. Then select the Close button.
You will then be returned back to the creation screen:
If desired you can now also resize and move the frame in any fashion you wish. Simply click on the frame and drag it to move or resize the frame.
The next option for a frame would be to use a different frame than the one included in the theme. To accomplish this task simply click on the existing frame and select the Remove button located in the top menu bar. This will delete the existing frame. Now you can select a new frame by clicking on the Master Frame Library button located in the bottom left of the screen.
You will see several frame category buttons located on the left side of this screen. For this tutorial click on the Wood button.
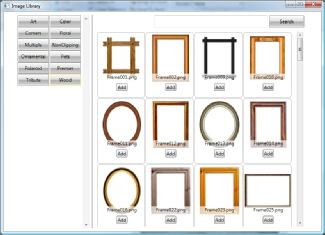
The Master Frame library provides you with two options. First, if you would like to copy a frame from the Master library to your library than you can select the Add button located under the desired frame. If you would like to simply use the frame directly from the Master library than you can select it and place it onto your project. To do this, locate the desired frame and place your mouse pointer on top of the frame. Hold down your left mouse button and drag the frame. The library screen should than disappear and you can drag and drop the frame onto your project. Then close the Master Frame library screen. You should now see the selected frame in your project. Click on the frame and drag it to the desired location. You can also resize it as previously described. To place a photo into your new frame, follow the previous steps of double clicking on the frame and selecting a photo.
Now maybe you would like a photo that has no frame and just crop your photo. For this exercise we will place a photo onto the project and crop the photo into an oval shape. To accomplish this lets first remove the frame you just placed. Click on the frame and select the Remove button located in the top menu bar. Then select the My Photos button located on the left side of the screen.
Now maybe you would like a photo that has no frame and crop the photo. For this exercise we will place a photo onto the project and crop the photo into an oval shape. To accomplish this lets first remove the frame you just placed. Click on the frame and select the Remove button located in the top menu bar. Then select the My Photos button located on the left side of the screen. The following screen will then appear:

You should see the photos you uploaded during the data entry screens. If not or if you need additional photos you can select the Add Photo button and add more photos. If the photo is there you want to use simply place your mouse point on top of the photo and hold your left mouse button down. Then drag the photo and place it onto your project. You can bring more then one photo into your project if you would like. When completed close the My Photos Library screen.
This photo can be moved as well as resized by clicking on it, holding your left mouse button down and dragging it to the desired location. You can resize it by placing your mouse pointer on the corner and holding your left mouse button down, dragging it to the desired size. To crop this photo place your mouse pointer on top of the photo and double click your left mouse button.

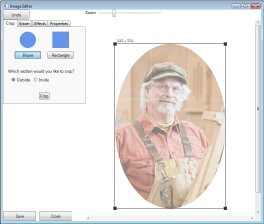
Lifelong Publisher provides many tools to edit your photos. One of these tools is a cropping tool. To crop your photo into an oval shape select the Ellipse button located on this screen.
You will then see a box appear on the screen.
Using your mouse you can drag this box and resize the oval to any oval shape you
wish.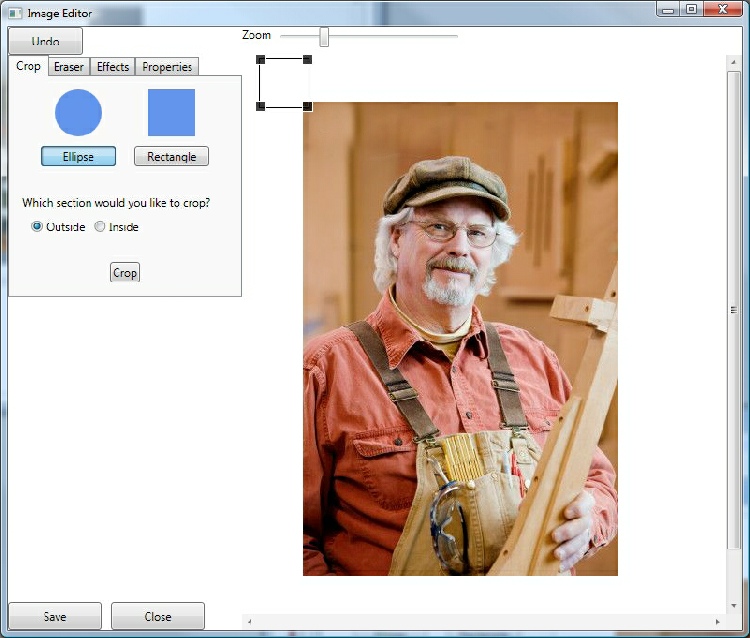

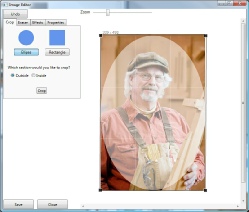
Once you have the desired oval shape select the Crop button. If you are happy with the cropping then select the Save button.
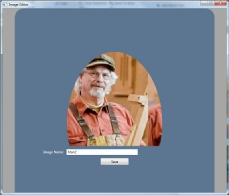
You will then be shown an Image save name screen. You can give this image a different name so it will not affect your original photo.Then select the Save button.
Now you can select the Close button and you will be returned to the Project screen with your photo cropped.
Now for this next exercise let’s assume you would like to delete the background around your photo. To do this lets first remove the cropped photo from our project. Click on it and select Remove from the top menu bar. Then select My Photos and drag and drop a new photo onto your project.Then double click on the photo and open the editing screen.
To erase the background surrounding the photo, click on the Eraser tab in the Edit screen.
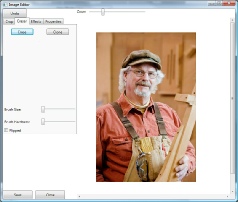
The screen will than change showing you the eraser controls. Click on the Eraser button. Then you can control the size of the edit brush and the edge feathering with the Brush Size and Brush Hardness slider controls. You can also Zoom up the image to allow for tight areas that will need to be erased. After you have the brush size and hardness set simply start erasing the background by holding down your left mouse button and erasing the items you would like to erase. If you erase to much or make a mistake you have an Undo button to rely on. Once you have finished erasing the background select the Save Button.
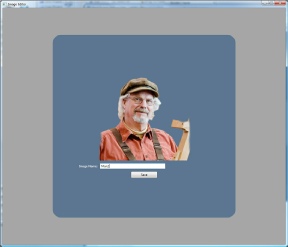
Give the new edited image a name and select the Save Button. Than select the Close Button
Like the Frames you can resize your photo and move it to anywhere you would like to move it to. You can also use the Bring Forward and Send to Back commands to arrange the items on your 2UP service folders.
This photo background erasing capability will add a new dimension to your personalized service folders.
Now you are ready to print your service folder. To accomplish this you will select the Print option from the top menu bar. Then select the Print Layout option.
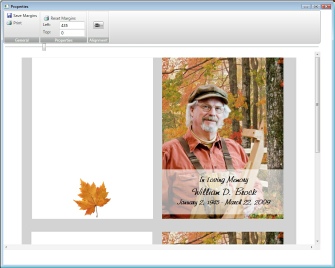
Your Lifelong Publisher program has preset print margins set and should work well in most cases. But from time to time you may have to set the margins for your printer. It is suggested that the first time you print a product that you first print to a plain piece of paper and overlay the print with the perforated sheet that was supplied with your Service Folders. In the case of the 2up Medium service folders this sheet size is a letter size sheet. To print your folders simply select the Print option in the top menu bar. You will than be shown a print dialog for your printer. You can check the properties to make sure the print is letter size and uses heavy paper. Then select OK to send the print to the printer. If the print margins need to be set for your printer simply click on the image in this print dialog screen. You can change the margin numbers for both the top and bottom print by typing new numbers to move the print in the direction it needs to be moved to for alignment. Otherwise you can also drag the image and move it. Once you have proper alignment you will select the Save Margins option to save the margins for future printing.
After you have completed printing your 2UP service folders you should select the Save Project command located in the top menu bar. Then you can return back to the products screen by selecting the Home button.


You are now ready to work on the inside of your service folders. To get to the inside of the folders you can simply turn the page by placing your mouse pointer on the corner of the cover, hold down your left mouse button and drag the page. If preferred you can also click on the thumbnails at the bottom of the screen to turn pages.
Lifelong Publisher will automatically bring in the inputted data you placed in the data entry screen. Just like the cover you have the ability to double click any text item and do an edit on it. You also have available Text libraries such as poems and prayers that you can also use. If you would like to use a poem other than the one included in the theme you can Remove it and replace it with a different one. To bring in a new text item click on the Master Text Library button, locate a new item and drag it into your project. If you would like to put an obituary in the text box you will first have to copy the obituary text to the clipboard. Your word processing program should allow you to do that.
When that is done, double click on the text box. Erase the poem that is in it and paste the obituary into the text screen.

Turn the page and you can also work on the back of the folder. You can put your funeral home loge and information here as well as any other text you would like.